This is some serious mad fun ladies. Break out the following supplies
(latex gloves optional) and let the glittering begin. Heat and Stick is the best thing to keep glitter in place and not rubbing off on everything that it touches, including you.
Supplies you will need:
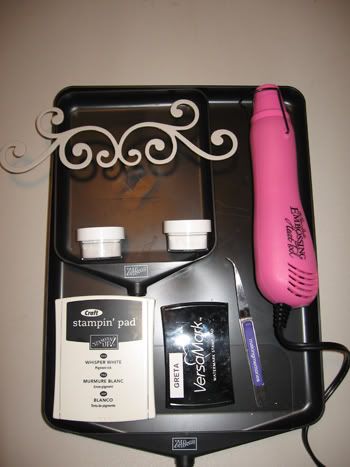
Heat Gun
Craft ink OR Versamarker
Heat and Stick powder
Glitter, flocking, sand, or colored sand (you choose)
2 powder buddy trays or coffe filters works fine
tweezers
chipboard or cardstock
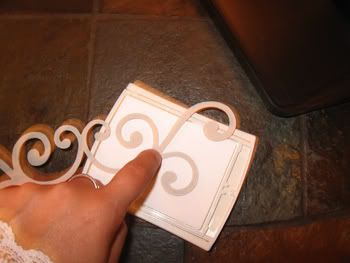
1. First you stamp your chipboard or image into pigment ink such as Stampin' UP! Carft pad, embossing pad or VersaMark Pad.
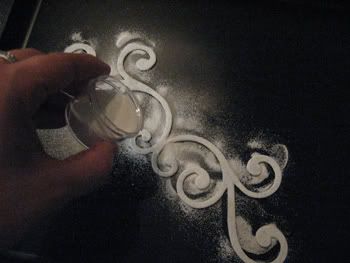
2. Then you generously apply heat and stick powder all over your chipboard, shaking off excess
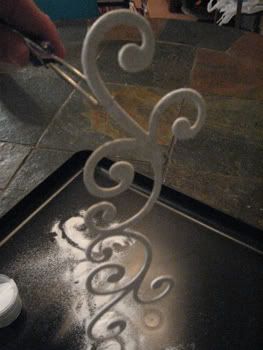
*note* if using versamark you will need to move quicker than you would with the craft pad because it dries pretty fast.
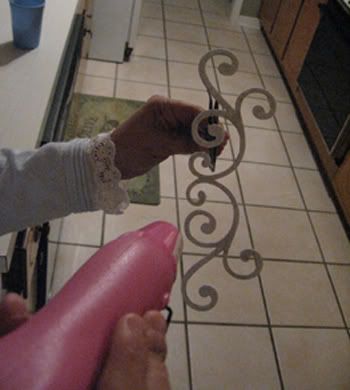
3. Heat your chipboard until you see it melt. If you over heat it looses a lot of the stickiness. When the image turns shiny and clear immediately stop.
*note* if you are using cardstock heat from the underneath. The biggest problem people have with Heat and Stick is over heating, which dries out the adhesive or "tackiness" thereby rendering it useless.
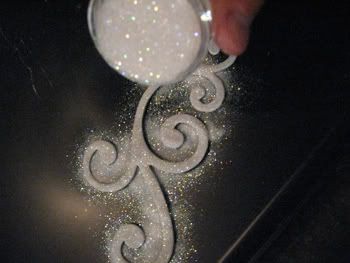
4. Spoon or do like I do and just dump straight from the container your glitter, flocking, colored sand or whatever else you choose over the warm sticky image or chipboard. Tap off excess but DON'T brush off all the flakes yet.
5. You MUST do this next step: Reheat image again. This will set adhesive. There is no precise anount of time and no visble change for the second heating. Basically you are now reheating to dry the adhesive so your glitter or sand or whatever you choose will stick. If using cardstock re heat from the underneath to reduce glitter blowing everywhere. Voice of experience talking here :)
IF you are using crdstock once the adhesive is set then you can brush off the remaining on the cardstock. You can rub your finger right across the image and have to worry about whatever you applied to the heat and stick coming off.
PLEASE NOTE CONFETTI FROM STAMPIN' UP! GLITTER STACKS DOES NOT LIKE HEAT AND STICK AND WILL CURL UP AND POP OFF. YOU DO NOT HAVE TO HEAT THE IMAGE A SECOND TIME WHEN USING IT.
Here's a tip:
Use colored pigment ink with colored glitter or colored ink with white glitter.
For that particular image up above I chose white pigment ink with dazzling diamonds glitter (both from stampin up) It's hard to see the shimmer in pictures but believe me it is phenomenal in person.
If anyone has any question please feel free to ask and leave you email in the comments and I will respond to you.
Happy glittering!
Wednesday, May 16, 2007
Cricut
Okay, I'm the first to admit it, I am a cricut freak! It is my absolute favorite scrapbooking tool! I purchased mine almost a year ago and have never looked back. The fonts available from Provo Craft are so cute and versatile and make creating a title so much easier. Each cartridge has several font options (tags, silhouettes, shadow, etc) and now some, such as Opposites attract, even offer more than one font. Gone are the days of searching through stacks of letter stickers trying to find a perfect match, only to find halfway through applying a word that you're missing a letter! With a few simple button strokes I have my title, the perfect size and color for my current project. The cricut completely takes the frustration out of scrapbooking and has considerably increased my production... and it is just so much fun to use!
***Some tips***
The most common dilemma I have hard from cricut users is how to adhere the cutouts. I have found that what works best for me is to run them through my Xyron machine. Refills are inexpensive and there is no mess! I have discovered that if you simply trace the cutout with a pen before removing the top layer of the Xyron sheet, you are able to avoid any extra adhesive that may be clinging to the edges of your cutout.
For more tips and ideas you can visit www.cricut.com. They have a great message board full of wonderful tips and ideas.
Wednesday, May 2, 2007
Stuck on Mod Podge
For some, the very words Mod Podge bring psychedelic visions of decoupaged furniture and ‘artwork’ from the 1970’s. But Mod Podge has made quite a comeback in the world of scrapbooking and altered art.
My first encounter with this gooey adhesive was 3 years ago, when I decided to alter an album cover. I had heard of people using Mod Podge to achieve the look I was going for, so I went out and bought a 16oz jar of Matte finish Plaid brand Mod Podge. (I am still using the same jar 3 years later…no one told me just how far this stuff will go!)
Armed with foam brushes, patterned paper, and other various embellishments, I tackled the somewhat daunting task of altering an album. After carefully applying a layer of ‘Podge to my album and adhering my first piece of paper I knew I was hooked. There is something to be said for the ability of altering a production line item to look like your own, and I loved the way the finished sealed project looked.
Since my first foray into altering, I have become a self proclaimed Mod Podge expert. This versatile stuff can be used solely as an adhesive, or can be used as a top coat to seal your finished product. I’ve used it on metal (sand first), wood, canvas, and chipboard. I’ve altered lunch boxes, albums, coasters, boxes, even a watering can! Mod Podge is inexpensive, comes in Glossy and Matte finishes, is water based for easy clean up, and is acid free so it’s safe for use in scrapbooking.
The key to using this adhesive is to keep your layers thin when using under paper, and smoothing out any bubbles. It dries fairly quickly, so you don’t have a long wait time between layers. I’ve found that when using dimensional items such as ribbons, tags, or even textured stickers, a thin top coat works great for sealing them to the project.
If you are thinking of creating any altered artwork, or just making an album one of a kind, then I would recommend investing in a jar of Mod Podge.
Subscribe to:
Posts (Atom)