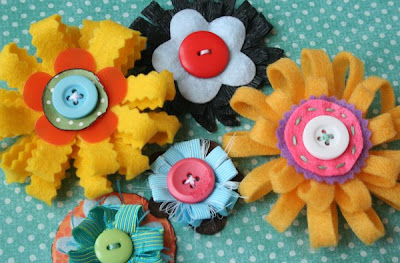
 These flowers are so quick and easy, you'll become addicted to making them!
 STEP 1: Cut felt into desired width. This sample is about 2.5" wide.
 STEP 2: Fold the strip in half length-wise and baste the two edges together using embroidery floss of strong thread.
 STEP 3: On the loopy side cut into the strip like you are making fringe. These will be your flower petals. Below is a side view of the loop flower petals you have created so far.
 STEP 4: Cut your thread and pull the two ends together, cinching the flower into a circle. Tie a knot with the two loose ends to close.
 STEP 5: Cover the center opening with a large button or embellish with other felt layers/flowers/etc. as desired. Your cute flower is ready to use in a project! :D
Cut your strip wider for larger flowers. You can then layer these together to make a fuller looking flower, as shown below.
Another fun option is to use sharp pinking scissors to cut your "fringe" flower petals.
 Here is a sample flower with two layers of zig-zagged petals.
 I made the one below using crepe paper birthday streamers. Instead of stitching the two edges together, I glued them, cut the fringe, and then attached the strip of loopy fringe to a punched circle cardstock base.
 Here is the back of the birthday streamer flower.
 For a shabby flower, I used wide grosgrain ribbon. When you cut the fringe into the ribbon the edges fray a bit, giving you this cute look!
 Here's another sample. This ribbon had wire in it which I simply removed after stitching the two edges together.
You can layer your different flowers together to create infinite possibilities!
 And here is a card I made using one of my flowers. (Card design inspired by Melissa Phillips)
I hope you have fun with this technique!!!! Link us up to your creations! We'd love to see them!


