.

Wednesday, December 15, 2010

Holiday Paper Wreath

Has anyone else seen these beauties floating around? I have, and I've been just waiting until I had a free moment to create one! My friend Jenny Chesnick has been making them with classes full of ladies at her local store for years, and though I have no clue how she made hers, I can usually find a way to jimmy something together. HeeHee!


I started out by gathering a few supplies. I ended up using a few more things than I started with, so I'll list those here, too, even though they're not pictured.
20 - 6'x6' pieces of double sided paper {5 - 12x12 sheets)
1 scalloped diecut paper
1 sheet of accent paper to cut into strips and accordion fold
1 - 8" circle of coordinating paper to glue the cones to
1 - 4" circle of coordinating paper to glue the accordion folded accent paper to
1 - 9" piece of ribbon to make the hanger for the back
letters and embellishments to finish
scissors
trimmer
hot glue gun


Start by rolling the 6x6 papers into cones.

Secure by gluing under the top edge with a glue gun.

I laid them out as I rolled  to be sure that I had enough. The amount you need will depend on how you roll them. :)


I needed 20 to complete my circle:

Now pull out your 8" circle:

Start attaching the cones to the circle with your hot glue gun - about 4" in.

Glue more cones on:


Until you complete the circle:

This is where I added my scalloped paper {after doing something else first and taking it off! LOL), but you could embellish how you like!

I then topped my scalloped paper with this accordion folded shape. To make it, I started by cutting my accent paper into 3" strips. Fold three of the strips to create the accordion circle. I did about a 1/2" fold. Then glue to strips end to end.


Glue to the 4" circle:

Finished:

Layer it on top of the scalloped paper, and embellish! {Note: I used the final 3" strip of paper to create the little banner that I added my letters to!

To hang it up, I hot glued a piece of ribbon to the back:

If you have any questions, please post in the comments! I'll check back and try to answer!

Journaling tip

Hi there!

Over on the message board a couple of people had questions about how I did the typed journaling on this layout I made using the Bedford Falls kit.
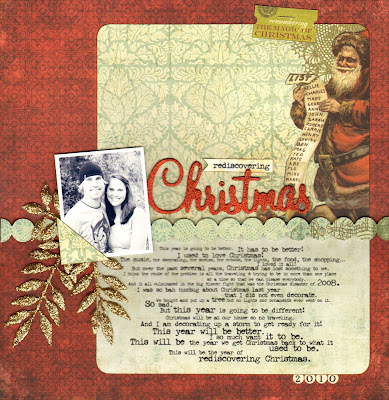
Well it is not basic typed journaling that you would do in Word.
I actually used Photoshop!
So I thought I would hop over here and try to walk you through how I did it.
****
PREFACE...
I am very much a paper scrapper!
This journaling technique is about as close as I get to digital/hybrid scrapping.
That being said, these instructions are going to be very elementary!
And that is not because I am trying to talk down to you.
No way!!
I just don't know all the technical, fancy computer/Photoshop terms, etc. etc.
ha!
****
OK here goes...

{I am using Photoshop Elements}

Once you open Photoshop, go to

File > New > Blank File

Then a box pops up this is what I put in there:

Preset” is Custom.

Then I make my “Width” 8.5 inches and “Height” 11 inches because that is what size my printer is going to print.

I have no idea what “Resolution” is but mine defaults to 72 pixels/inch so that is what I leave it on.

Color Mode” defaults to RGB color and that is what I leave it on.

Background contents” are white.

Now you have a blank canvas to work with!
Look for the “Horizontal type tool”.
It looks like a capital T.
For all you University of Tennessee fans, it looks like your T.
:)

With the “Horizontal type tool” you can pick the font, color, and size that you want.

You can also use it to drag your typing and move entire phrases/sentences/paragraphs around the page.

OK so click on the “Horizontal type tool”.

Then go click somewhere on your blank canvas.

Now what you have done is create “Layer 1”.
{the layers show up on the bottom right corner of my screen}

Try typing something. What you are typing is your “Layer 1”.

If you hit “Enter” you will create another layer: “Layer 2”.
And so forth.

So basically what I did on this layout is create a layer for each line of my journaling.

{I ended up with like 17-18 different layers. Each layer was a different sentence basically}

By doing that I can move each line around and change the size of the font.

Take the first 3 lines of my journaling for example:

“This year is going to be better.”

“It has to be better!”
”I used to love Christmas!

Each of these sentences is a separate layer.
You know how in Word everything is so evenly spaced like single or double-spaced??
Well by doing your journaling this way, you can move your sentences around to create as little or as much space as you want between your lines instead of having to stick with what the program makes you do.

It is fairly easy to move between layers to make edits and stuff.

All you need to do is click on the layer ("Layer 1", "Layer 2", etc) over on the right side (not actually on your canvas).

Once you click on the layer over on the right, you can go back to your canvas, click on that sentence and make edits.

It is almost like clicking on the layer over on the right brings to life that layer on the canvas and you can edit it.
If you have not clicked on a layer, then you cannot adjust it.


Then once you have all your journaling like you like it, you are ready to print it out!

Cut your patterned paper down to the size of your printer.

Feed it through your printer like you would regular printer paper and print away!!

Gosh, I hope I explained that process so it makes
some kind of sense!
My recommendation: play with it and experiment!
Get the hang of how your Photoshop works!
Let’s discuss!
I will start a thread on the message board if you have any questions or need me to explain something better!

Happy scrappin’!!

gretchen

Tuesday, December 7, 2010

Adhesive Tips


As you guys well know, I love my masking tape. However, my love affair with adhesives doesn't end there.

I got asked fairly frequently about what kind of adhesives I use, so here's a video for you guys showing the types I personally like to use for my projects. I would LOVE to hear your feedback on the types you guys use and love! :)

Enjoy!


Monday, November 29, 2010

Fringe Trim on a Snowy Banner!


I have a tutorial to share with you today with a fun technique I used on this "Snow" banner I created using the "Snow Day" collection from Crate Paper. You can find the "Snow Day" collection in the Noel Mignon store. I love the bold, fun colors in this collection that are sure to brighten up any dreary winter day. I hand drew my mitten template and cut the snowflakes out using the Christmas/Noel cartridge with my Cricut. I wanted something to hang across my china hutch and I love that the banner isn't necessarily for Christmas but something I could keep out through January and February and March and April (sometimes winter in Iowa lasts that long, you know?!) (Be sure to click on the images to see them larger.)


Here's another look at my banner and all the fun bits and pieces of ribbon, tulle and paper. 


To keep things consistent, all of the mittens were cut using the "Mittens" patterned paper (aptly named, huh?) I chose to bring out the teal, yellow, pink and green of the patterned paper and used somewhat neutral patterns from the Crate Paper collection to create accordion medallions edged with silver Stickles. The kraft centers were punched using a scalloped circle punch. The chipboard letters are Melissa Frances and I also used mica flakes to add to the snowy look. 


I used the "Shadow" feature on the snowflakes and backed them with kraft cardstock. The Cricut cartridge was Christmas/Noel.


The ribbons are by various manufacturers including American Crafts, May Arts and Basic Grey. 


I strung the banner on a wire and curled it to help hold the pieces of it in place. 


And here's my tutorial on how to create the fringe trim I made on the mittens. The trim color coordinates on each individual mitten with the accordion medallions. As I was putting the banner together, I tried to come up with ways to give it extra dimension and texture. That's how this fringe trim was born! 

First I cut five 1" pieces of Melissa Frances white crepe paper. 


Next, I stacked the pieces on top of each other and then machine stitched down the center. 


I used a fine tip scissors to cut small fringe on either side of the machine stitching. 


The piece should look like this after cutting the fringe. 


Next, I used my fingers to ruffle up the trim and it looked like this when I was finished.


I used Tattered Angels Glimmer Mist on this particular piece of fringe. I sprayed one coat and let it dry with a heat gun to speed the drying process. Then I repeated this step. 


Once dry, I ruffled the fringe a bit again. 


Here's a look at the fringe on one of the mittens.


And here's the completed banner again...I love the pops of color! 


I can't wait to try this technique out on a layout or card!

Until next time,
Jill

Sunday, October 24, 2010

Halloween treat bags

I have a really easy way to make some fun Halloween treat bags. I believe I saw the original idea for this on Jennifer McGuire's blog. I like making fun little treat bags for holidays and the idea I'm going to share with you is really easy. So here's the treat bag:

First I'll start with the embellishments I put on the front of the bag. I took the cute little Halloween stamps that came with the Sleepy Hollow kit, Versamark & some embossing powder. The frame I stamped on black cardstock with Versamark, sprinkled some iridescent embossing powder, then heat set with my embossing gun.

For the skull I did the same thing but used purple embossing powder. Then I cut both images out.

For the bag, take a strip of paper that is 4" x 12". I chose some Pink Paislee paper from the Sleepy Hollow kit. You can use regular cardstock but patterned paper is fun because it already has a design on it.

Score your paper on the long end at 4", 6" and 10". If you don't have a scoring tool you can use your paper trimmer & a bone folder and score right in the groove of your paper trimmer. But don't press too hard because you'll go right through the paper. After you score it your bag will look like this:

You can go ahead and fold the small flap over at the top and adhere. Then, holding all of the top layers together, take a small circle punch and punch 1/2 the circle at the top. This will be the opening for your candy bag to stick out.

Decorate the front of your treat bag, then get a cellophane bag and fill with candy. Be sure to eat all candy that accidentally falls out ;) Most craft stores have cellophane bags but regular 'ol sandwich bags will work, too. Twist the top and put through the inside center of the treat bag & adhere ribbon.  And there you go...fun little treat bag!

Now I know some people don't do Halloween stuff, so I also made a little treat bag using some goodies from the Sweet Sue & Seaside Cottage kits.
By the way, these are fun little treat bags to give to teachers!